3.4. phpMyAdmin: How to administer MySQL via Web
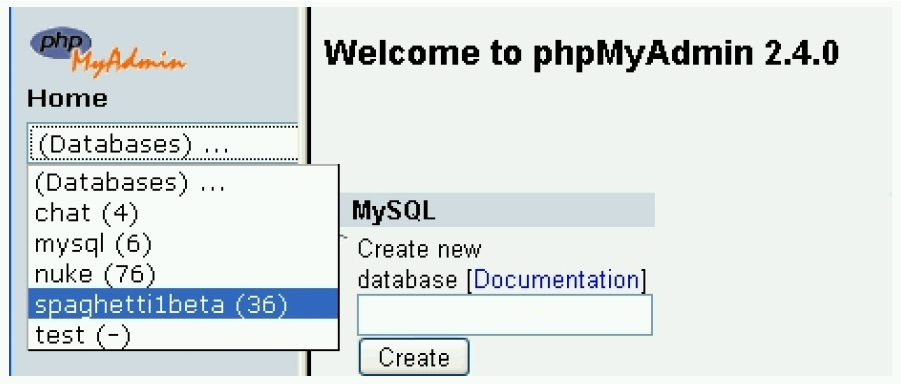
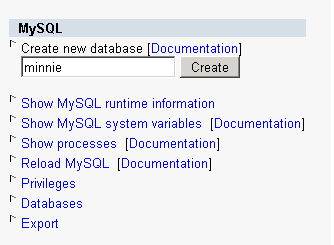
Once you have opened your phpMyAdmin (to do this, if you are working locally, you would have to open http://localhost/phpmyadmin with your browser), you will get a screen that offers you the possibilities of
Select a database through a drop-down list.
Create a new database
as in Figure 3-7.
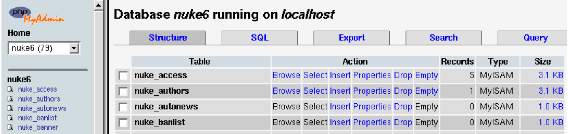
Once you have chosen the desired operation, you arrive at the administration interface of your phpMyAdmin. Newer versions contain a navigation bar, located at the top (Figure 3-8), offering the following options:
Structure: See the database structure.
SQL: Execute SQL operations (e.g. load an existing database).
Export: Make a backup of the database.
Search: Search for data.
Query: Display the structure of an SQL query (useful for programmers).
Drop: Delete a database (be careful!).

As far as we are concerned here, we only need to explain the first 3 items:
3.4.1. phpMyAdmin navigation bar: Structure
“Structure” presents a list of the available tables in the database, with the follwing accompanying options:
Browse: shows the content of the table.
Select: is used to make SQL queries to the table.
Insert: is used to insert new data into the table.
Properties: displays the structure of the table, ie. its fields, their type, length etc.
Drop: deletes the table (be careful!).
Empty: empties the content of the table, but does not delete the table itself, it leaves it empty (be careful again!).
The most frequently asked questions in this context are:
- HowĀdoĀIĀdeleteĀaĀsingleĀrecordĀofĀtheĀtable?
Select the table, click on “Browse” and select “Delete” for the record in question.
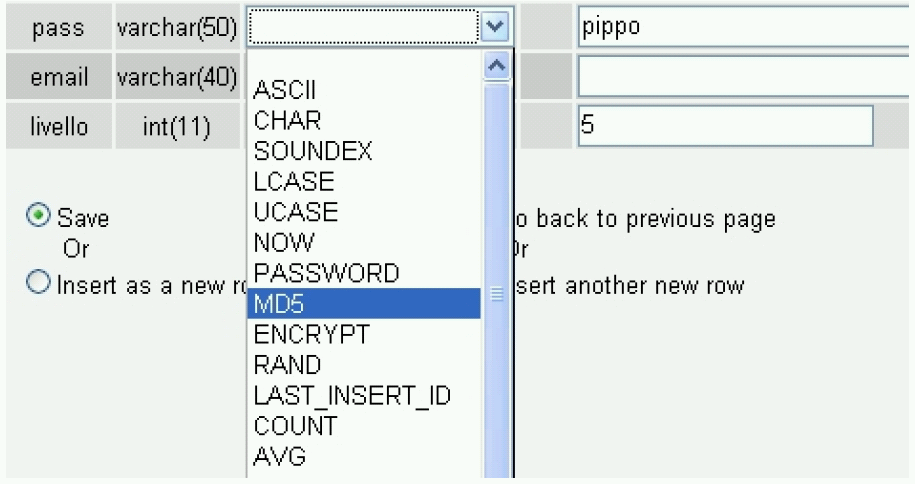
- IfĀtheĀpasswordĀisĀstoredĀencryptedĀwithĀMD5,ĀhowĀdoĀIĀchangeĀit?
Select the table, click on “Browse”, then on “Edit” and enter, in clear text, the desired password. Select from the drop-down “Function” menu besides the field the desired function, in our case “MD5” (see Figure 3-9). See also Section 3.9.17.
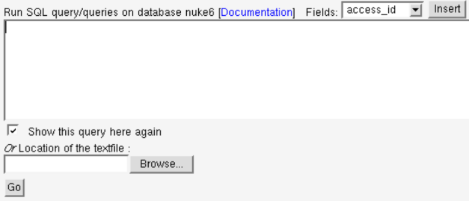
3.4.2. phpMyAdmin navigation bar: SQL
“SQL” serves the purpose of “loading” whole datasets or already existing databases with one action. The datasets (or the database) are presumed to be already available in a MySQL “dump file”. This is a text file containing all the necessary SQL queries that must be sent to the database server, in order for the datasets or database to be created. An example of such a dump file is the nuke.sql file that comes with PHP-Nuke and contains all the database instructions for the tables to be created during installation (see Section 3.4.5).
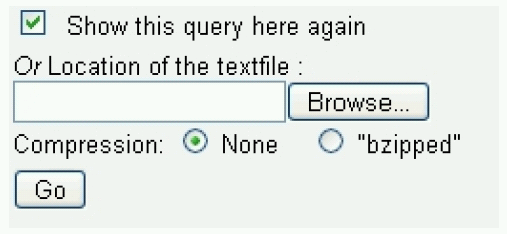
The use of this function is very simple: just search your system for the dump file you want to load, by hitting the “Browse” button (Figure 3-10). MySQL dump files usually come with the “.sql” ending, but “.sql.php”, “.txt” or even “.php” are also in use. Whether the file is a MySQL dump file or not, can only be told by inspection: open it with a decent text editor (see Chapter 11) and if the first lines look like
# MySQL dump 6.6 # ... # # Table structure for table 'xxxxx' # CREATE TABLE xxxxx ... ... # # Dumping data for table 'xxxxx' # INSERT INTO xxxxx ... |
i.e. if it contains CREATE and/or INSERT SQL statements, then it is a dump file (see also Section 3.4.3).
This function is useful when you want to create whole databases and fill them with data in one step, but it is also very useful when you want to add data to an existing database. However, this does not mean that it will always succeed: especially if the dump files are very large, this operation my exceed the PHP CPU limit (usually set to 30 sec. by the ISPs). (see, for example, Section 27.16)
 | Beware of long .sql files! |
|---|---|
You can of course use phpMyAdmin to comfortably import any MySQL dump file, i.e. from a previous backup of an existing installation with thousands of forums posts. In this case, the import may take longer than the limit on the execution time of PHP scripts that most ISPs set (usually 30 sec.). You will end up with a half-filled database! In this case, either cut the file up into smaller chucks and use phpMyAdmin to load the smaller files, or insert the text piecewise for execution in the text area field of phpMyAdmin that is there for this purpose, or, as a last resort, do it from the command line, as shown in Section 3.2.4. See also how to import a '.sql' (>3M) file to mysql database with phpmyadmin?, Importing .sql files into an existing database in phpmyadmin. |
3.4.3. phpMyAdmin navigation bar: Export

The “Export” function is useful for obtaining backups of our database (we recall that this is also possible to do from the administration panel of PHP-Nuke, see Section 7.1). The management console we get for this function is quite detailed (Figure 3-11):
In the central area, we have a list of the database tables, while to the right we have the backup options:
Structure only: backs up the structure of the database (tables, their fields and their properties), but not the data it contains (i.e. the tables are left empty).
Structure and data: will save not only the structure, as above, but the data in the tables as well.
Data only: will save only the data, but not the structure.
XML: saves the database in an XML format.
The options that appear in the lower part of the screen have to do with the extra features the created backup file should have:
Add 'Drop Table': Prepends an instruction to destroy any existing table with that name to the instructions that create that table. For example, if we already have a table “nuke_authors” in our database, this option will take care of removing it, before it loads the structure and/or data for a table with the same name. Otherwise, attempting to import a file that contains structure and/or data for nuke_authors will result in an error, since the table will already exist. You should check this option if you are reinstalling PHP-Nuke over a previous unsuccessful instalation and you think you might already have some tables there.
Save as file: will save the backup as a file (which will be compressed accordingly, with either ZIP or GZIP, if the “zipped” or “gzipped” boxes are checked - other versions of phpMyAdmin may only offer a “bzip” compression).
If we don't select any table from the table list, phpMyAdmin will deduce that we want to save all tables. In case you want to select only some of them, just click on the ones you want with the left mouse button, keeping the CTRL button pressed.
To export a database from the command-line, without the use of the graphical tool of phpMyAdmin, you just do:
mysqldump -u dbuser -h dbhost -p dbname > dbdump.sql |
where dbuser, dbhost and dbname are the database user, host and name respectively, exactly as entered in config.php (Section 3.7).
3.4.4. phpMyAdmin: other commands
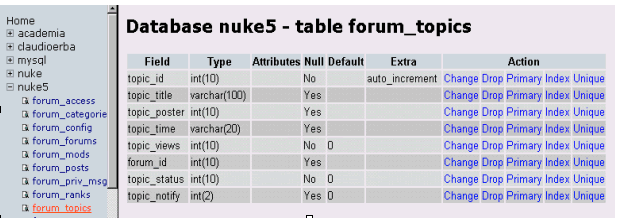
Yet another couple of instructions: In order to see the structure of a table, you only need to click on the one that is marked in the left bar and you will see all its fields and modification options appear in the central part (Figure 3-12).
| ATTENTION! |
|---|---|
The DROP command eliminates all the contents of the DB, the table or the single field, use it with caution. |
To learn more about the possibilities that phpMyAdmin offers you in administering your databases, see Doing More With phpMyAdmin (Part 1) and Doing More With phpMyAdmin (Part 2). The first part explains how to obtain the software, install and configure it for secure access, and use it for tasks such as managing multiple servers, manipulating user privileges, viewing reports on server activity, and exporting MySQL records into different formats. The second part explains the more advanced aspects of the application, including using it for transformations, maintaining a history of all the SQL queries executed in the phpMyAdmin session, defining relations between tables to create JOINs automatically, creating E-R diagrams in PDF format, and bookmarking important queries for future reference.
3.4.5. How to install the DB of PHP-Nuke with PHPMyadmin
Create a database that will contain the PHP-Nuke tables (see Figure 3-13). The name of the database should be the same name as the one you entered in config.php (see Section 3.7).
To populate the database, you have to import the nuke.sql file, exactly as we showed in Section 3.4.2 for general database dump files. Clicking on the left bar, depending on the database you selected, you will see a list menu coming up, showing the structure of the database (and, on the same time, the central page will show the enlarged structure of the database), with a series of options, all of them in the bottom of the page (see Figure 3-14). It is these options we are interested in when installing PHP-Nuke.
What you have to do now, is to click on “browse” and go search for the .sql file that contains the instructions that build the structure of the PHP-Nuke database (see Figure 3-15). Once found, it suffices to click on “Go” and the database will be installed. Of course, if there are errors, they will be reported at the end of the installation procedure. And of course, the same holds for the message “operation succeeded”.
| Don't delete the whole database on the ISP! |
|---|---|
If you have bought some hosting space on your ISP's servers, you may not be able to create databases at your will, but be constrained to use only the one that your ISP created for you. In this case, you can create, delete and modify its tables and their contents, but not the database itself! Don't drop the whole database, as you may not be allowed to recreate it! |
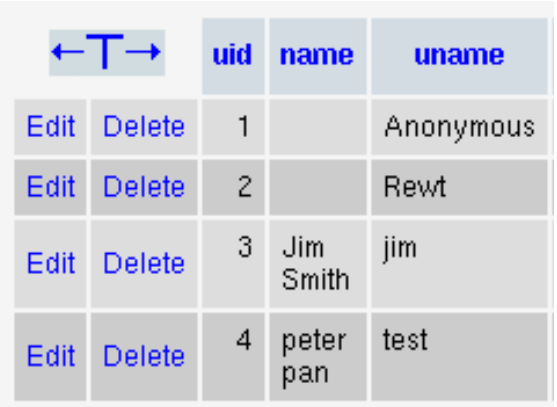
You can verify that the tables were populated with data by browsing their contents (Figure 3-16) - click on the small icons besides their names in the left frame for this (if you click on their names, you will only see their structure).
Other options of PHPMyAdmin that are not relative to the installation of PHP-Nuke, but still useful for the administration of the database, can be found in Section 3.3.